wave tucks

wave tucks

Thursday, August 30, 2012

Patterns and Ribbons and Fur...oh my!

Last week we installed this fun teen girl's room, complete with a 20 foot curved section of wall with 7 windows, and two separate side windows with window treatments and also bedding.

Here are the many patterned, embroidered, solid, furry fabrics and the trims which were used in this project.  Aren't they fun?


The client's daughter had definite opinions and was fearless about color and mixing fabrics - she has a great eye for mixing patterns and textures and it was fun to work with her and her mother on this project.

The turquoise and white trellis fabric was chosen for the traversing drapery panels.  There were 10 widths of material in the curved wall of windows, and the side windows were treated separately but in a matching fashion.

Here is the rendering showing the curved wall of windows with the trellis fabric panels and the purple embroidered valances:


The valance fabric was solid purple with circle several colors of rattail cord shaped into coils and embroidered into place.  It was colorful and textural.  I was careful to figure the valance fabric cutting lines and placement of the coils so that they did not interfere with the top and bottom hems by causing bulk and unsightly flaring.


Here is part of the finished installed large window treatment:


We added turquoise twist cord across the valance pleats and topped each pleat off with a turquoise satin ribbon bow.

Here is a larger photo of most of the bedroom - sorry it is not clear!  I will take another photo when we return to install some shades in the den in a couple of weeks.


The bedding includes a custom quilted coverlet and a variety of pillows.  The vivid colors and pattern of the comforter's main fabric was accented by quilting stitching around the larger motifs.  The back of the comforter is a solid purple fabric, but we chose a lime green bobbin thread so that the motif stitching is accented on the back for an additional embellished detail.

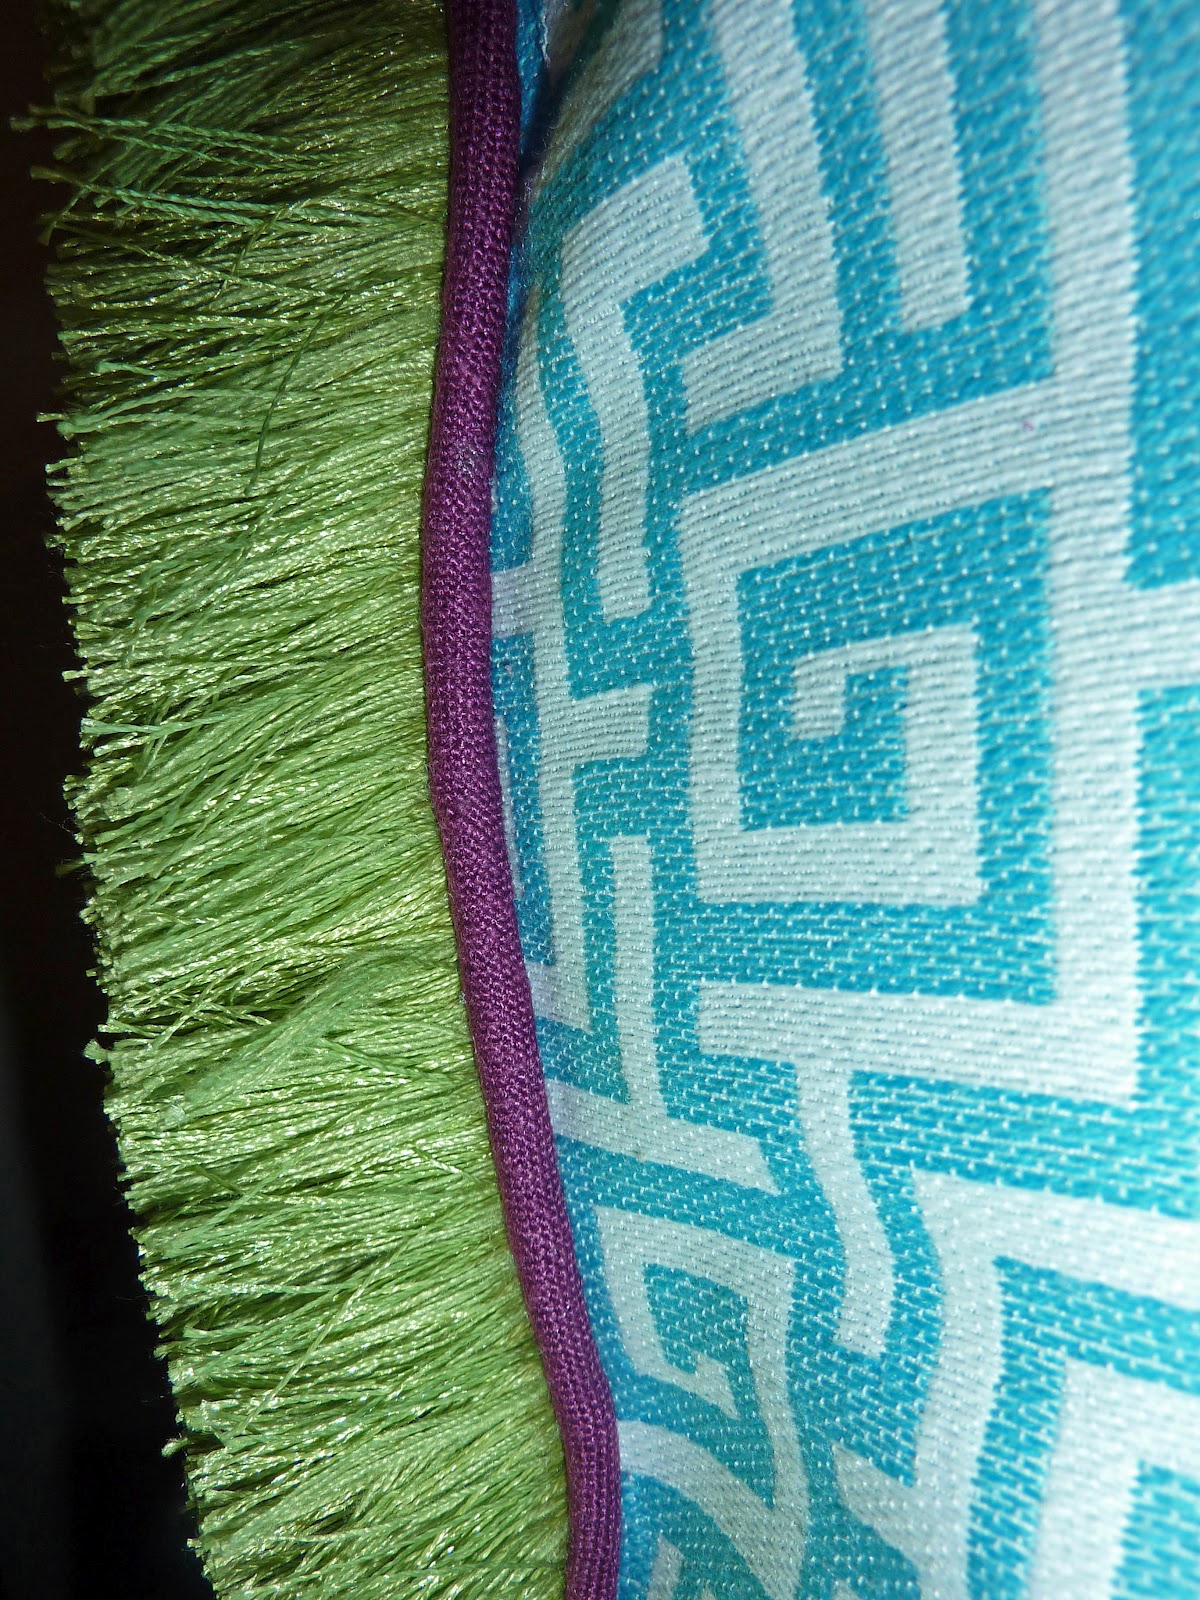
Two king shams were made using the drapery panel fabric and detail was added using cording
made from the purple comforter backing fabric and a lime green brush fringe.


Three super soft pillows were fabricated using a fluffy furry fabric that is SO incredibly soft!  We mixed hot pink and turquoise furry fabric for these pillows.

For the front neckroll pillow, we mixed a purple crinkle poly fabric with the embroidered valance fabric as a centerpiece, accented with lime green microcording
and turquoise ribbon bows.


This was a fun project and the daughter was thrilled to start the new school year with a
new bedroom to study and sleep in!

Hope you enjoyed the latest project by SK Designs!

Susan

Sunday, August 12, 2012

Magical Media Room

Last week we installed a very fun media room window treatment.  The walls and ceiling in the entire large area had already been painted a dark blue, accented by constellations and stars.  The single window already had a blackout motorized shade, so our goal was for color and design purposes instead of for privacy or light control.

Below is a photo of a section of the wall - very cool!


We wanted to carry the star/constellation theme into the window treatments but also wanted to add some Hollywood glam.

Some of my Houston drapery colleagues gave me some great ideas for this project, including using stars or constellations as embellishment.  Then I utilized my Minutes Matter Studio software program to propose one of Jackie Von Tobel's Designer's Directory of Window Treatments styles to my client.


As you can see in the rendering, we originally planned on having a panel on each side of the cornice, but the refrigerator actually is much taller than in my rendering, hiding the panel on the right.  So we opted to have a double panel on the left side, allowing for a more lush look.  You can see that in the photo below.  In actuality, the cabinet and the refrigerator completely block the far right side of the window.  Because of this, the cornice was built to be centered between the front of the cabinet and the left wall, which allows the treatment to be completely seen even though it is not centered on the window.  This helped to provide a more balanced view of the treatment.

We selected two beautiful velvet fabrics - one an aubergine velvet and the other a sky blue velvet.  To add to the bling we wanted metallic silver cording for the top and bottom of the cornice, and tassels for the areas between sections, and a tassel tieback for the panel.

We decided to use the flat area of the cornice as an embellishment area to include star patterns in Swarovski crystals.  My client loved the idea and  I searched the internet for Swarovski crystal transfers and found these two that my client liked.


I ordered both iron on transfers in order to use them as templates for the custom design.  I wanted to use purple, light blue, iridescent and clear crystals in graduated sizes.  Once I received the transfers, I used my copier to reduce and enlarge the single star pattern so that the sizes would vary somewhat on the cornice.  After cutting out the desired sizes, I traced them on to chipboard and cut that out in order to provide a more stable base to form the outline of the crystal placements.

The placement of the outlines were adjusted and moved around until there was a balance that was not overwhelming for the project, and then I began to apply the crystals.  A adjusted some of the pattern to better fit the area available on the cornice.

The metallic silver cording and tassels were the perfect accent to the overall treatment.   Here is a closeup photo of the cornice.  Some of the crystals show up better than others, due to the camera flash, limited lighting in the room, and color of the crystals.


And now, here is the completed treatment!


I hope you like this project as much as my client did!

Thanks for reading -

Susan


Tuesday, June 5, 2012

Pretty Pillows


You might remember this client's master bedroom window treatment and bedding project, which I posted last year.


Yesterday I delivered some pillows for the chaise lounge in this large room.  We had just the smallest of pieces left of the fabric which had been used on the bed's scaldino.  Sometimes having fabric constrictions helps decide the style and size of the projects we are working on.  I had juust enough fabric of the patterned gold/red/blue fabric to center the pattern motif on the envelope pillow.  
]
During the project's design phase, I had purchased a number of different styles of tassels so that the client and I could determine which looked best on the valance horns as a decorative accent.  While fabricating the valance, we decided that the treatment stood alone on it's own quite well, with the mix of solids and patterned fabric, along with the microcording and the tasseled trim at the hem.  So we elected not to use the tassels on each horn.  Therefore, I had some left over when working on the pillows.  I cut off most of the tassel's cording tie and formed a sweet little bow at the top of the tassel and hand stitched it onto the point of the envelope pillow.  Just the right touch!


The client had provided the bolster pillow form, and we wanted to tie in two or three of the fabrics on this pillow.  My client gave me creative license to do whatever I wanted, so I decided to use the gold silk fabric for the pillow body and made a sort of cummerbund wrap in the embroidered fabric and accent everything with covered buttons and cording - so pretty!


The square pillow received some finishing touches also.  We added the tassel trim which was used on the valance hem, and microcorded the edge between the trim and the pillow for a dressmaker detail to top it all off.


I hope you enjoyed this mini Pillow Palooza!

Susan

Thursday, May 10, 2012

Teaching and Learning at an Industry Trade Show


At the end of April, I attended the Window Fashions Vision 12 Expo conference in Chicago.  This event is the largest conference for designers, decorators and window treatment professionals in the United States.  I was there to attend a few classes as well as to present two classes...it was so much fun!

The event was held in conjunction with KBIS, the Kitchen & Bath Industry Show, which is really massive but we did not have time to visit their exhibit floor at all.  However, KBIS' keynote speaker was my personal favorite TV designer, Candice Olson.  She was easy going, light-hearted and very funny.  There were literally thousands in attendance to hear her presentation.


Another speaker was Tobi Fairley, of Tobi Fairley Designs in Little Rock, Arkansas.  She rocked the roomful of attendees awake at her 7:30 a.m. presentation.  She is a ball of energy and ideas and her presentation was terrific.  Below is a photo of me with Tobi following her class.


Between presenting and taking classes, we had time to visit the vendor hall and see what is
 new in our industry.  As always, I love seeing new fabrics.  The fabrics below are from
Catania; aren't they gorgeous?: 

Embroidered silk in neutrals

Beaded raspberry silk - yum!


Embroidered linen

There were some wonderful new hardware designs also.  I loved the flexibility of Orion's new line: 
it comes in 54 standard finishes (plus custom finishes). 


You can select the rod style and finish, as well as the finials and their finish, and also the decorative inlay pattern, whose finish can match or contrast the other choices you have made.  So many options!


After an inspiring spin on the showroom floor, it was time to teach some classes.  The event hosts had designated some attendees as "Vision Spotters" and they took photos throughout the event during classes and on the showroom floor and posted them on Pinterest.  Here are a few photos the Vision Spotters took in my classes:
It is always fun to teach at the Vision events!

Attendees asking questions after class
Giving a demo on the showroom floor for designers & workrooms
We did not have any time to visit the beautiful city of Chicago - but it was so pretty and full of tulips in the esplanades and with wonderful architecture.
It was also fun to visit with colleagues from around the country and to meet new colleagues and friends as well.  I had a great time.

The host and producer of this extraordinary event is Grace McNamara.  She puts on a terrific show with great classes and top notch vendors - it is a winner every year.  This is my fifth year to teach for Vision.  Below is a photo of me with Grace - thanks, Grace!

 Hope you enjoyed my trip - I know I did!

I hope to see you soon...
Susan Kostelecky

Friday, May 4, 2012

Decorator Showhomes in Houston


Whew - I haven't posted in a VERY long time!  However, I am "back at it" and promise to keep more current with my blogging since my major deadlines on projects have all been met and I have returned from a series of speaking engagements in New Jersey (along with a side trip to New York City) and Chicago, where I saw Candice Olson speak (very funny and engaging), as well as contemporary designer Erik Bruce (so talented and inspirational) and Little Rock, Arkansas designer Tobi Fairley (fun and very spirited)...more on those in my next post!


When Spring is in the air, my mind turns to Home Tours and Showhomes!  This weekend, Houston has two showhomes open for touring to help you gain decorating ideas and inspiration.  I hope to visit them both this weekend or next.

First up:  Houston's first Southern Living Showcase Home, located at 5307 Aspen in Bellaire.  This home will be open today, Friday May 4 from 12-6, as well as Saturday and Sundays (May 5 & 6, May 12 & 13 and May 19 & 20) from 10-6. 

This home will also include demonstrations from a variety of chefs and floral designers.  Tickets are $10.  For more information, visit www.stoneacorn.com.


Next up is the Pink Ribbon House 2012, which is located in Hunter's Creek at 10619 Fairlane, Houston (77024).  This brand new showcase home has a variety of decorators and designers who have designed different rooms and areas throughout the home.  This home is open today, Friday, May 4 from 10-3, and Saturday, May 5 from 10-5, and Sunday, May 6 from 12-5.  Tickets are $15 each.


Hope to see you soon!

Susan