wave tucks

wave tucks
Showing posts with label SK Designs. Show all posts

Monday, January 4, 2021

 Happy 2021!  Hope you all are well and looking forward to this New Year.

2020 definitely was a challenging year in many ways, but there were also many positive things that we would like to make note of:

Our anniversary:  SK Designs celebrated 25 years in business in October!  We were so busy we didn't even have time to recognize this milestone on social media, or send a newsletter, or update our blog!


Our office space:  we updated, expanded, organized and brightened our office exterior and interior.

Website: we are in the process of updating our website right now, and expect it to go "live" within a week or so.  Can't wait to show it to you!

We will be sharing these things and more in more detail with you this year.

Our first share is the revitalized exterior of our studio. Last year we added a bright and festive yellow and white exterior rug, which I loved.  Recently I made and added the black and white scallopped awnings to the entrance doors.  As we all know, one thing leads to another.  I loved the high contrast of the black and white, but now I wanted to paint the white office doors.

Since yellow is my favorite color, I painted the door pale yellow, but it faded away.  The new black and white rug really grounded the entry and demanded a stronger color.  I tried a few shades of turquoise/teal, which coordinate with my logo and also the butterfly bench.  Love it!  

My husband also ripped down the old and tacky carport near the office entrance.  It had protected his beloved barbecue smoker, which is why we kept the carport for so long. That item has now been moved to another protected area, which meant the carport's time to depart had arrived at last! While the carport did provide some protective covering while walking from the house to the studio, it was dark underneath and felt claustrophobic. 


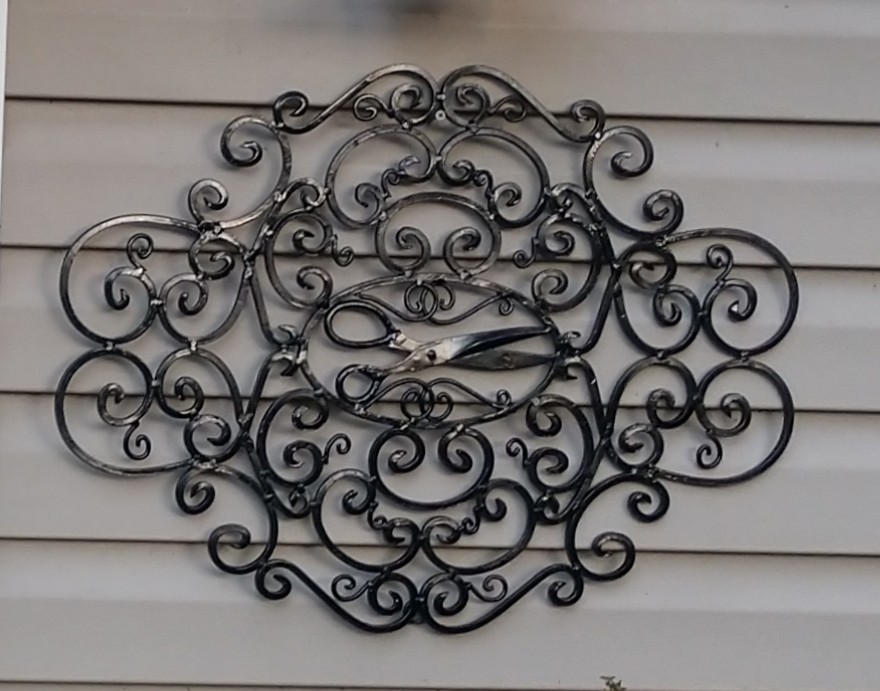
The photo collage shows the evolution of the entry door.  I also added the embroidery hoop "Welcome" decor (thank you, Etsy!) and the wrought iron piece featuring scissors as the centerpiece, which had been on the wall in my office.  

It is fun to walk into my studio with the new bright and happy entrance.


Thank you for supporting SK Designs and being part of our exciting journey of growth.  We love our clients and are honored to have assisted so many Houston area homeowners with their window treatment and bedding projects.


Susan Kostelecky, Owner


Sunday, January 13, 2019

Yes, it has been forEVER since my last blog post!

2018 was very busy for SK Designs; we had many wonderful client window treatment and bedding projects, attended a great drapery workroom trade show in October, added a commercial walking foot machine to our workroom, and are looking forward to 2019.

Here are a few of my favorite things from 2018:

Beautifully detailed pillows for a bed.  The green grosgrain ribbon is formed into a Greek key design on these Euro pillows and the neckroll has a reversible cummerbund wrap.


These dining room draperies remind me of liquid silver!  These panels are made from a beautiful silk fabric and feature a stunning embroidered band on the leading edge.  The trim and fabric work so well with the "oyster shell" finish of the drapery hardware.


Another gorgeous banding detail on these study drapery panels in the same beautiful home.  Bandings are very popular right now and come in wide variety of widths and styles.  They are so awesome!


One of my favorite projects of 2018 (below).  These custom arched rods complement the French blackout lined drapery panels in this stunning living room.  Love these!


The silk drapery panels below have a (sort of) funny story.  We had installed these somewhat recently and my client called me a while later to let me know that her dogs like to look out that window and they also tend to play a little in front of the arched window.  Guess what? They were playing and actually tore the fabric at the hem.  Now this was not a matter of the hem being tugged out of place; the fabric was actually split and torn!

Fortunately we were able to obtain more of the same fabric, and even more importantly, the dye lot matched perfectly!  So we replaced one width of the panel and added hold backs to keep the panels out of the way of playtime.  Mission accomplished!


We are in our fourth year of teaching a free after school Sewing Club at an area elementary school.  Here are a few photos from the fall semester.  Photo #1 shows some of my students.  SK Designs is also sponsoring a second Sewing Club at another school which has another great instructor (photos 2-4).


 Looking forward to a great 2019!

Monday, October 9, 2017


SK Designs is celebrating 22 years in business! 
 
I know it has been a verrrry long time since I posted, but now is the perfect time to provide some updates and new photos! 
 
We are very excited to be celebrating 22 years of serving the greater Houston area with beautiful custom window treatments and bedding, as well as blinds, shutters and shades!
 
Coincidentally, a colleague of mine interviewed me for her weekly podcasts.  Ceil DiGuglielmo owns a customer drapery business in Warrington, Pennsylvania, and she began interviewing industry professionals about a year ago.  I met Ceil several years ago when I presented a seminar to her area's WCAA (Window Coverings Association of America) design & workroom group. 
 

You can learn how SK Designs began and how things have changed for us in the past 22 years here:  http://tinyurl.com/skdpodcast

Last year I showed a couple of photos of a sorority house project I had worked on in 2015, but could not show the completed photos because I planned to enter the project in an industry contest.

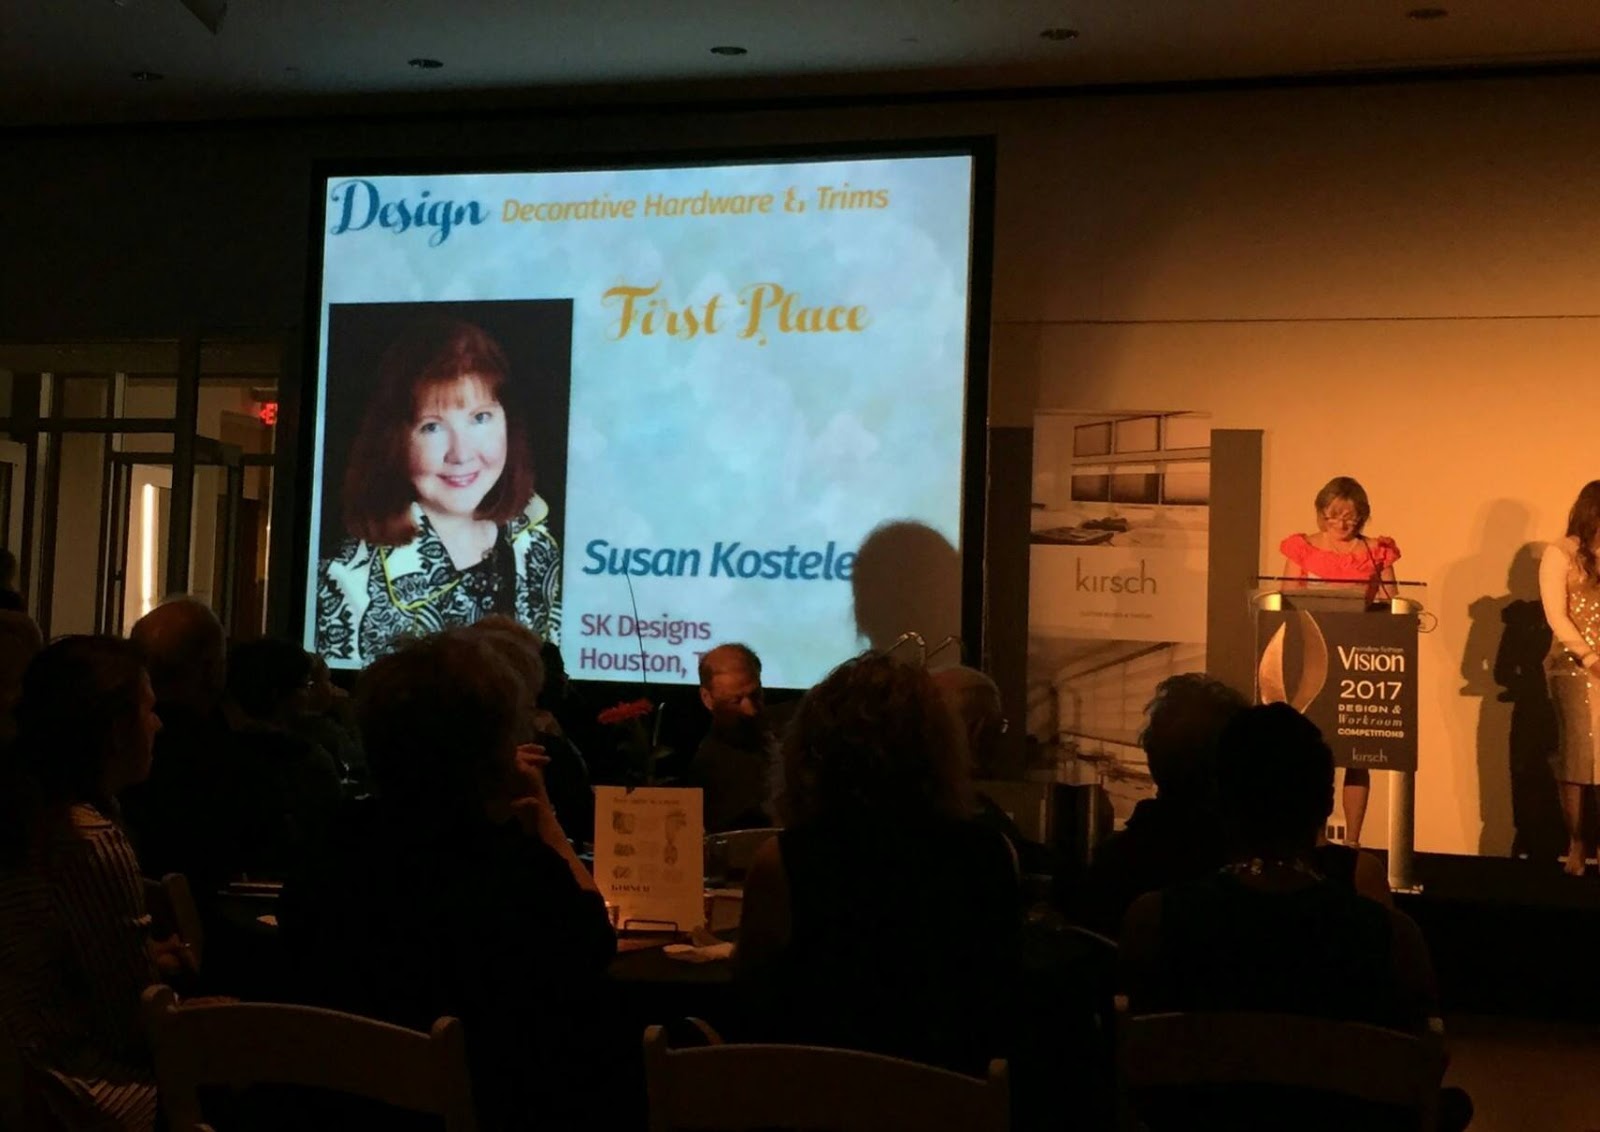
I can show the photos now, because the contest has been completed, and the project won First Place in Decorative Hardware and Trimmings at the IWCE (International Window Coverings Expo) which was held earlier this year in Charlotte, NC.

I was unable to attend the conference and awards ceremony, but some wonderful colleagues took photos of the screen at the ceremony so I could see what had happened!


It was exciting news; this project was near and dear to my heart and included some beautiful hand-sewn details, such as Swarovski pearl details, wave tucks, and a laser cut silk replica of the sorority's crest.  The crest was comprised of many small fabric pieces which were carefully applied by hand to the roman shade in the main living room of the Gamma Phi Beta house in San Marcos, Texas (Texas State University.

Here is the original rendering I proposed for the project:


 The embellished detailing still makes me swoon! 

The leading edges of the drapery panels featured the wave tucks with the pearl detailing.  This detail was also included on the bottom hem of the roman shade.


The crest shows all of the tiny pieces which were laser cut by It's Oksana in Chicago, Illinois.  The carnations were made of numerous delicate pieces of pink silk, the stems and leaves also comprised of several pieces, and the lantern's embossed look was also made of several dark brown silk pieces, all hand applied very carefully (see photo at right). (Photos by Brandy Stoesz Photography)

Here is the full project photo:

 
 We have been busy with many other projects since our last posting; here are a few of my favorites!
 
The memory pillows above were made from a dear father's shirts for his daughters.

Beautiful silk drapery panels in this dining room are perfect and the stationary roman shades above the side windows help unify the height of the three windows even though the side windows are lower on the wall than the front arched window.


Embroidered drapery panels are carefully planned to allow them to be pleated to pattern; the symmetry is so pretty in this new home's study. (photo by Brandy Stoesz Photography)


This stunning family room's architectural details and beams are softened with stationary drapery panels on a custom curved rod which follows the arch of the windows. (Photo by Brandy Stoesz Photography)


At right, these embroidered drapery panels are pleated
to pattern and break on the floor for softness. (Photo by Brandy Stoesz Photography)


I hope you've enjoyed catching up on some of our latest projects and news and that you like the new lighter blog background.

I look forward to showcasing some of our favorite projects from the last 22 years in upcoming blog posts.

Susan Kostelecky


Thursday, April 14, 2016

Spring Projects & Updates from SK Designs


Happy Spring, everyone!  SK Designs has been very busy this Spring with client projects, continuing education, volunteer projects and outdoor projects too...you will see a little of each of those things in this blog post.
 
In 2014, we created a layered sheer and drapery treatment on an arched rod for a beautiful master bathroom with an arched window and ceiling.  The photo of that project is below.
 
 
That client had recently changed the wall treatment to a gorgeous black (yes, black!) wallpaper on a couple of walls, including the wall behind the bathtub.  Another wall in this gorgeous room has black textured wallpaper with sparkling crystals in it...it is stunning!  She wanted to replace the arched drapery panels but use the existing custom rod, which we did.  Here is the completed project, below.

 
Isn't it lovely?  The dramatic dark background is just beautiful.  I love the rug also...and it is sparkly!  After we installed the panels, we realized there might be times where the homeowner would like to have more light in the room from that beautiful window, but still want privacy.  So we are going to add a semi-sheer treatment behind the panels, and the existing drapery panels will be held back with these very glam, layered holdbacks.  They will be the perfect complement to the crystal knobs and pulls on the cabinetry. The smaller starfish style holdback actually stacks on top of the silver and crystal one, for added dimension and sparkle. I love these!   
 
 
Wait until you see the selected fabric for the under sheers - you will have to be patient and see them in a future blog and after they are installed. 
 
SK Designs also replaced existing drapery panels in the adjacent master bedroom.  This is also a gorgeous room!  We will be replacing the sheers next.
 
  
Another new client wanted stationary silk drapery panels for her dining room, which will be hung on decorative metal hardware.  I proposed stationary roman shades for the side windows also, to fill in the space above those windows also, and to utilize her remaining fabric from her upholstered dining chair seats. 
 
I created a rendering showing both options - with and without the shade, so she could visualize the difference and make her choice.  
 
 
She selected the option with the roman shade :). This will add visual height and make use of the existing complementary fabric. 
 
Another recent project had a great result.  It was for traversing drapery panels for a music room.  The wall treatment and decorative (and functional) musical instruments make this a striking room! 
 
 
We lined the drapery panels in blackout lining and bump interlining, which is a very heavy interlining.  This will help reduce sound from permeating outside of the room.  We took careful measurements and planned the length of the draperies and the location of the drapery hardware so that it fit on the top strip of the horizontal wood wall treatment.  It looks great!
 
In addition to a wonderful variety of client projects this year, I attended a drapery workroom fabricator's conference in February which was held in Charlotte, North Carolina.  It was the first time in many years that I attended an event as an attendee, and did not have any teaching or coordinating responsibilities.  It was a delight!  It was so much fun to see so many colleagues and friends all in one place again.
 
One of my favorite classes was by Penny Bruce, who owns a terrific drapery business in England.  She taught a class on Pleating on Design and showcased many photo examples of how fabric can look very different depending on the pleat locations.  The photo below shows the same fabric which is pleated in two different locations in the pattern repeat.  It is amazing how different the end result is and how much that determination can change the look of a treatment.
 
 
Last fall, I began teaching an after school Sewing Club class at a local public elementary school.  I contacted the school principal to see if they would be interested in offering this class, and she happily agreed.  We have 5 students (4 girls and 1 boy) from the fourth and fifth grades.  We had a waiting list of 50 interested students - oh my!  Classes started in October and we kept the same students into this semester, and will finish in May.
 
Their first project was to learn some hand sewing skills.  They selected a fabric and their choice of buttons, and sewed them using an embroidery hoop and designated markings for each hour of a clock.  Then we added a clock mechanism, so they have their own personal embroidery-hoop-clock!  They were so excited to be able to keep their projects and take them home.
 
 
We have also made a pillowcase with banding, a drawstring bag, a reading pillow (a pillow with a large pocket on the front to hold a book) with carrying strap, and an apron with contrast pocket, rickrack detail and ribbon sash.
 
 
This week we took the kids on a field trip to Joann Fabrics so that they could select fabrics, trim and thread of their choice for their Mother's Day project.  They had a great time picking out things that they thought their mothers will like.  It was so much fun; I think I might have had more fun than they did.


This wonderful spring weather has had me (finally) motivated to work in the yard.  I found two vintage sewing machine bases and have turned them into planters (thank you, Pinterest!)  This one is outside of my studio, and has a Sherwin Williams antique wooden box attached for the planter. 


The photo at right shows the Singer sewing machine base that is on my front porch. 
I hope you have enjoyed the latest activities and updates from SK Designs - hope to hear from you soon!    Susan

Wednesday, January 20, 2016

New Awards for SK Design Projects!

My favorite industry trade magazine, Window Fashions - Vision, annually hosts our industry's largest convention, the International Window Coverings Expo (IWCE).  This year the event is held in Las Vegas, in conjunction with KBIS (the massive Kitchen & Bath show). 

I was unable to attend the event this year, but was notified that SK Designs is the recipient of TWO awards, which were announced at the awards ceremony last night.  Whoo hoo!

The project below was awarded Second Place in the Decorative Hardware & Trim category.  This was a wonderful window treatment project for an open concept family room and breakfast area. 

Photography by Brandy Stoesz Photography
Decorative metal hardware was used in the family room between the swags, and coordinating accent hardware is featured on the mini cornice and swag in the breakfast room.

The bonus feature of the above project is that this wonderful client was referred to me by a very talented and multi-award winner colleague in Denver, Colorado.  She had worked with this client in the Denver area, and recommended SK Designs to her when the client moved to the Houston area.  We have completed numerous projects in this home and are continuing now with another project.  Thank you for the referral, Sheri!


Photography by Brandy Stoesz Photography

The adorable slipcovered rocker shown to the left was awarded First Place in Upholstery and Slipcovers!  This fun project was created using a raspberry textured fabric, a cream matelassé style fabric, and a floral barkcloth fabric.  The client purchased vintage pinch pleated draperies (the barkcloth fabric) at an antique show.  SK Designs took the draperies apart and determined which parts were still usable and undamaged by time and use.  We had *just* enough fabric to match the pattern repeat on the front of the chair back and the seat cushion.  We turned the fabric pattern sideways for the seat cushion boxing, which created a pretty design feature (and was necessary due to the limited fabric. 


Photography by Brandy Stoesz Photography

 Contrast cording was made from the cream colored fabric, and a small pleated frill accents the bottom hem (below which Velcro is used to attach to the bottom of the chair frame in order to secure the slipcover in place) and at the top of the chair back.

The photo below shows the entire room, which features custom pillows, duvet and bedskirt, by SK Designs.  Isn't the room adorable?  I love the shabby chic collections that the homeowner has found at area antique shows!

The charming story of the slipcover is that the chair was purchased by my client's father for her mother, and she was rocked in the chair as a child.  She now rocks her own grandchildren in the chair, which is known as the "magic chair" for always soothing the children in the chair.


Brandy Stoesz Photography

Tuesday, April 14, 2015

Not Your Everyday Project - Pinterest Inspiration

I spend a little (too much) time on Pinterest; do you?  I found this fun project that I thought a couple of my clients might be interested in for their kids - a Fort Kit!


Each kit includes some sheets, suction cups, clothespins, plastic clips, clothesline and flashlight.  The suction cups, clothespins and plastic clips can be used to attach sheets to each other, or to other things like windows or furniture to create an extra big fort in the location of choice. The clothesline can be used to drape the sheets over in order to add height or a pitch to the tent.

I think this is a great gift idea or even a fundraising auction event donation.


One client has two adorable sons who are as creative and smart as their parents.  Their kit was combined in a camouflage fabric tote bag.


Another client has a little girl who loves manicures and pedicures, so he requested the fort kit be modified somewhat to appeal to her love of spa treatments.  Done!  I had some fabric remnants left over from her bedroom window treatment project last year, so I used that fabric to make her tote bag.

I added some bright nail polish and some color coordinated nail files to her kit, and tied the tote bag with a pink ribbon.  Adorable!

I can't wait to hear how she likes her spa kit!

Hope you enjoyed this project, which is a little different than my usual window treatment or bedding projects!

Susan


Wednesday, January 14, 2015

2015 = the 20th Anniversary of SK Designs!

It is hard to believe that SK Designs started 20 years ago!  We are celebrating with a new website - visit the new site at www.skdesignscustom.com .  Hope you like it!

Lots of things have changed since I started working in our living and dining rooms in 1995, sewing on a single home machine.  As our business grew, we began to overtake our home, and needed more space and more heavy duty equipment.

Eventually, we built out part of our guest house, transforming it into the SK Designs studio. Finally, the machines were out of the house, we had room for more machines, a padded pinnable large worktable, a suspended commercial iron, and room for lots of pegboard walls in order to display completed window treatment projects as well as fabric sample books.

Want to take a look at an efficient professional drapery fabricator's studio?  

Below is the entryway to SK Designs.  Client thank you notes are posted on the striped bulletin board straight ahead, and vendor files and client files are in the cabinets on the right.


Bins with client samples, trims, patterns, etc. are also located in the entryway, along with display photos of some past projects.


As with any business, it is important to have the correct tools for the job!  By investing in commercial sewing machines, a more efficient work space, seminars and trade shows, I could complete projects more professionally and more easily.  Here are a couple of our commercial machines:


It makes a world of difference having all of the things needed to design, draft, fabricate and display custom window treatments and bedding.  The walls of pegboard allows me to display fabric sample books as well as completed treatments ready for delivery.


As you can see above, I can also use the pegboard walls to drape chain weight when drafting overlapping swags.  This helps me check if the proportions and overlaps are the size that I want them to be.  You can also see the suspended Dofix iron floating above the table.  I love my Dofix iron!  It allows me easy access to the iron, while keeping the worktable clear for cutting, drafting and laying out fabrics for treatments in progress.  There is no dangling electrical cord getting in the way that has to be moved out of the way frequently.

Below is a photo of the tool storage and prep area.  Pins, screws, fabric staplers, chalk marking tools, magnetic pin bowls, zippers and zipper pulls, roman shade cord orbs....lots and lots of little pieces are stored in this area.


Of course, there has to be room for inspiration!  Here are just a few of the window treatment and design books that I have collected over the years.


I hope you have enjoyed the mini tour of our studio!

Thank you for your interest, support and business throughout our 20 years!

Susan Kostelecky