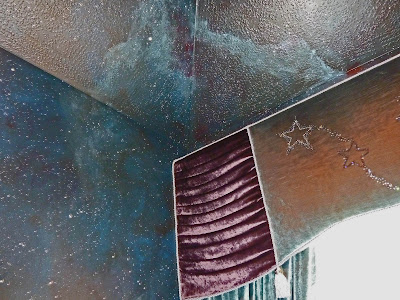
Below is a photo of a section of the wall - very cool!
We wanted to carry the star/constellation theme into the window treatments but also wanted to add some Hollywood glam.
Some of my Houston drapery colleagues gave me some great ideas for this project, including using stars or constellations as embellishment. Then I utilized my Minutes Matter Studio software program to propose one of Jackie Von Tobel's Designer's Directory of Window Treatments styles to my client.
We selected two beautiful velvet fabrics - one an aubergine velvet and the other a sky blue velvet. To add to the bling we wanted metallic silver cording for the top and bottom of the cornice, and tassels for the areas between sections, and a tassel tieback for the panel.
We decided to use the flat area of the cornice as an embellishment area to include star patterns in Swarovski crystals. My client loved the idea and I searched the internet for Swarovski crystal transfers and found these two that my client liked.
I ordered both iron on transfers in order to use them as templates for the custom design. I wanted to use purple, light blue, iridescent and clear crystals in graduated sizes. Once I received the transfers, I used my copier to reduce and enlarge the single star pattern so that the sizes would vary somewhat on the cornice. After cutting out the desired sizes, I traced them on to chipboard and cut that out in order to provide a more stable base to form the outline of the crystal placements.
The placement of the outlines were adjusted and moved around until there was a balance that was not overwhelming for the project, and then I began to apply the crystals. A adjusted some of the pattern to better fit the area available on the cornice.
The metallic silver cording and tassels were the perfect accent to the overall treatment. Here is a closeup photo of the cornice. Some of the crystals show up better than others, due to the camera flash, limited lighting in the room, and color of the crystals.
And now, here is the completed treatment!
Thanks for reading -
Susan


Susan this is beautiful! I love the color choices! I think that this is HACDA website worthy!!!
ReplyDeleteLesa B. :)